9.3 Timelines & Tools ⭐
This section includes a mandatory Assignment ⭐
Product managers use a variety of tools to help manage the tasks that their teams need to complete. Roadmapping tools are software tools that let you easily make changes to a roadmap and see how a change in one task will affect your timeline further down. In this checkpoint, you will learn about these tools and why, when, and how to use them.
By the end of this checkpoint, you should be able to do the following:
- Describe the different stages of a typical product project
- Explain roadmapping terms and considerations (such as critical path and dependencies)
- Build a roadmap timeline using a digital roadmapping tool
Understanding project timelines
When you're assembling your roadmap, you need to think through all the effort that goes into getting features built and into your product. Time and resources are the biggest limiting factors for how much product you can ship. You need to understand and anticipate all the stages of work that will happen before you can ship even one part of the roadmap.
Research
Often you and your team will need to spend time understanding a problem better before deciding what needs to be done. This stage can include data analysis, user interviews, stakeholder conversations, and other means to understand what needs to be solved, ideate on solutions, and reach decisions.
Specs
Before any product work can begin, you will need to create a written description of the work to be done. This list of specifications (or specs) can be in the form of a product requirement document (PRD), a user story, or just notes about what needs to be done. You will learn more about PRDs and user stories in future lessons.
Having a concrete artifact that describes the work is essential for getting your team in sync and ensuring that the final outcome matches what was intended in the first place. Besides establishing the raw functionality, you should also set appropriate goals and KPIs at this stage and decide when and how you will monitor progress to know whether or not the project is successful.
Design
If the work is meant to be seen by users, you'll need to create designs for how the feature looks and feels. If you have a design team, you can work with them to ensure that their designs meet the requirements described in your specs. Your developers will want to review the designs to ensure they're feasible to build and can be completed within the allotted time. You'll also want to run these designs by your stakeholders and maybe even your users to ensure that your plans are on track to solve the problem at hand.

Development
The majority of time in most projects will be taken up by your developers building the software to accomplish the goals of the feature. While they're building your features, they'll often have questions that you'll need to address. New problems will often arise; there could even be critical issues that completely change a project. For example, a feature to add a search function to your website might be stymied by an extremely slow performance of your database. You will need to decide if it's worth taking the time and effort to fix your database performance or if the value of the feature is too low to justify it, and you should give up.
Testing
Before you can launch any feature, you need to test it and ensure that it works correctly and accomplishes the goals that you set out to achieve. Testing should include quality assurance (QA) tests to make sure the feature doesn't have any errors or bugs. QA could be done by you or—if you're lucky enough—you may have a dedicated QA team to help. Testing can also include acceptance testing—a process used to ensure that the feature actually solves the problem for your customers.
Sometimes you'll launch features in beta tests—an early release to a subset of users who can test new features before they're released to all of your users. Whatever the method, you'll need to make sure that testing, and fixing any issues that testing reveals, is accounted for in your project's timeline.
Ship
Launching a feature is about more than just making it available for everybody. You need to ensure that your internal teams and your users know about the launch and understand how to use the new features. You also need to monitor the use of the new features to ensure that they're working correctly and that they're meeting the goals you initially set. All of this is part of the process of shipping a feature to customers. For entirely new products, this stage would typically be known as a product launch (a topic several future lessons will focus on).
Iterate
After the new feature has been out for a while, you should revisit the results and make a decision about what to do next. Did the project achieve the goals? If so, you're done, and you can move on. If it didn't, do you need to try again? Or maybe you should give up and scuttle what you've done. Regardless of what you decide, remember that your work on a launch isn't truly done until you've learned from the results and made a choice about the next steps.

So why make timelines?
Now that you understand the many steps that go into developing a project, consider the benefits of having a clear timeline detailing when each step of this process will take place. First, a timeline will allow you to keep track of the state of your projects—what's in progress now, what's coming up next, exactly where in the process each project is, and what the next step is.
A timeline will also help you prepare other teams for the work that they'll need to do when your projects reach certain milestones. For example, your marketing and training teams will want to know when your new release is coming so they can create documentation and advertising for it. Similarly, you need to ensure every project is ready for your design and development teams well in advance of when they get to it in their queues.
Finally, timelines help you detect an issue when things go off track. If any part of the process goes too long, it has a chain reaction on all the other work that's coming next. For example, if your developers underestimate the amount of work needed to build a feature, the next project will start late, and the one after that, and so on. Other unforeseen issues can also throw off your schedule, including unexpected bugs, changes to the feature while it's in development (called scope creep), or an abrupt departure of a developer.
Because of this chain reaction effect, timelines work best as a short-term view of your upcoming work—from a few weeks to a couple of months. After that point in time, the effects of changes today will have too big of an impact on what happens months from now. Also, in most companies, priorities change quickly. You'll want to minimize the effort you spend on updating your timelines and roadmaps, so planning for shorter time windows is best.
How to create a timeline
Imagine that you've put together a prioritized list of features for your roadmap—you know which are the most important items and about how long they'll take (thanks to some estimates from your dev team). You now want to start putting them together into a roadmap timeline to show when development will begin and end on each.
The simplest way to do this is to take a timeline of weeks or months and place your projects along it in a presentation app, like PowerPoint or Google Sheets. The projects should be sized to approximately match the developer time it takes to complete them and placed when development starts. Take the top items on your list and place them on the timeline. If you have multiple dev teams, you can put multiple paths on your timeline representing simultaneous work by different teams. Always check with your dev team to make sure that your plan makes sense based on the resources available.

The critical path
Note that the roadmap above does not include design time or testing and launch time. That's because the critical path on most projects is usually development. The critical path is the part of a project that determines the overall length of the entire project. For software and hardware projects, the development of that software and hardware by your engineers is almost always the longest and riskiest part of the process. Most roadmaps focus on communicating and tracking that part of the process.
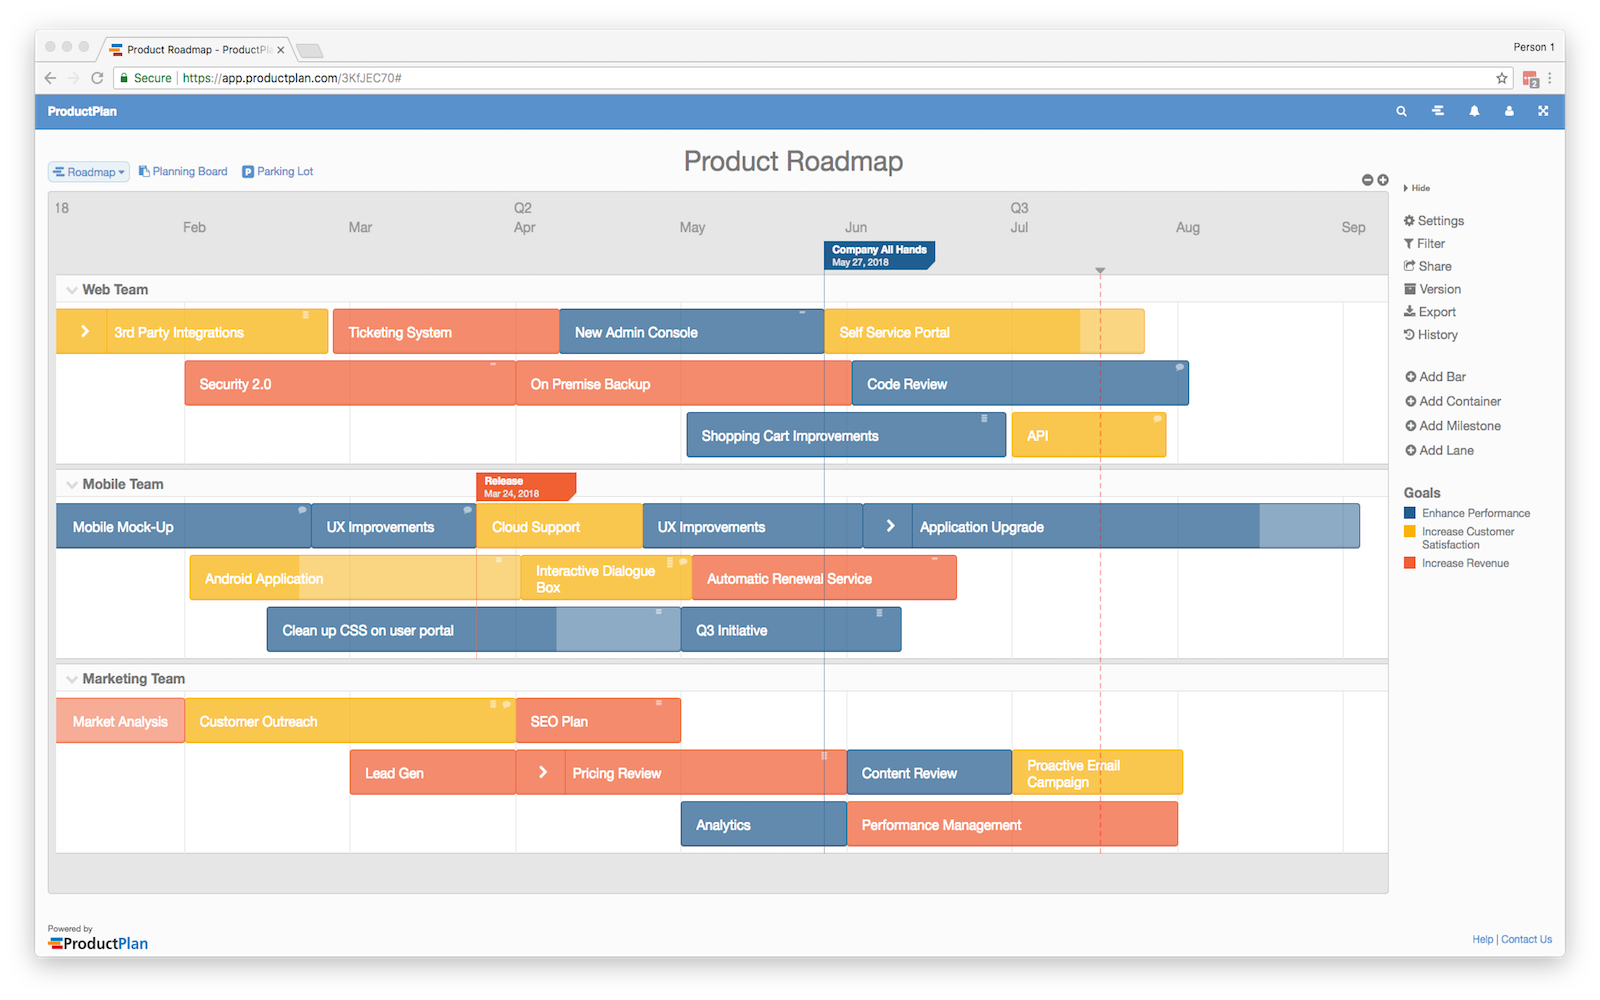
If you want to show the timelines for other stages of the project, like research and design, or for when you expect a given item to ship, you can use multiple timelines for those other teams or use icons for specific dates or events. Some roadmap tools also have unique ways of handling this. Take another look at the image below of a sample roadmap from ProductPlan for JIRA. Notice how the roadmap separates work by teams and uses red-colored flags to point out a release date.
While creating a roadmap in a presentation tool, as shown above, is possible and simple, doing so can be time-consuming, and it can be a challenge to get your roadmap well-formatted and looking good. Apps made specifically for managing project timelines can help achieve the same results faster and with less effort. You will learn more about some of these apps below.
Timeline pitfalls
It seems easy enough to just take the top item off your prioritized list, drop it into your roadmap timeline, and call it a day. Unfortunately, it's not quite that straightforward. When creating your project timeline, you need to account for other factors that might impede your work.
Many projects have deadlines that you need to adhere to. Even if an item is not the most important one, you might have to prioritize it in order to complete it in time. Another complication to consider is prerequisites. A specific feature might require your engineers to upgrade your database first, and you'll need to account for that additional project in your roadmap and timelines. Finally, some projects may depend on specific individuals for specific tasks. Maybe that database upgrade can only be done by one person on your team who has the expertise. If that person is currently occupied by other work, you'd need to plan your timeline around that person's commitments.
Taking another look at the simple roadmap that was created in Google Slides, you can see how the database upgrade work has to be completed before any of the other development tasks can proceed. Seeing these dependencies on a timeline is a great way to make the impact of such blockers (things that block other tasks from getting done) extremely clear.
Gantt charts
Some projects are so big and have so many moving parts that you need more sophisticated planning techniques to ensure that everything gets done on time and on schedule. One popular tool for achieving this is a Gantt chart. A Gantt chart is a specific format for visualizing all the pieces that go into completing a project, and it is often used to manage complex projects.

Image source: Wikipedia
In a Gantt chart, each row represents a part of the project that needs to be done. The length of the row represents how long it will take to complete. One of the benefits of a Gantt chart is the clear visualization of the project's critical path: it's the longest line from the top-left to bottom-right of the chart.
Gantt charts can be created manually by using a spreadsheet application, like Microsoft Excel or Google Sheets. Change the columns to the appropriate size, then use the cell color to show the duration of each part. It is, however, much easier to use a tool that creates Gantt charts.
Most tech organizations do not use Gantt charts. Nevertheless, you should be familiar with them in case you end up on a product team that does or in case you need to collaborate with other teams who use this popular project management method.
Roadmapping apps
Thankfully, there are many roadmapping apps available to make your life easier when creating project timelines. If you join an existing product team, it's highly likely they will already have some tools they are accustomed to using. Being familiar with these tools can give you an edge in the job interview process, as it will assure the interviewer that you can jump on board quickly. While you can't master all of the available tools out there, you should attempt to get significant experience with at least one of the tools. Most roadmapping tools work in a very similar way, so knowing any one of them is useful regardless of what your team ends up using.
Here's a short demo for one of these tools, called ProductPlan.
Now try it yourself! Start by signing up for a free account on the ProductPlan website. Follow along with the instructions below with ProductPlan in a parallel tab.
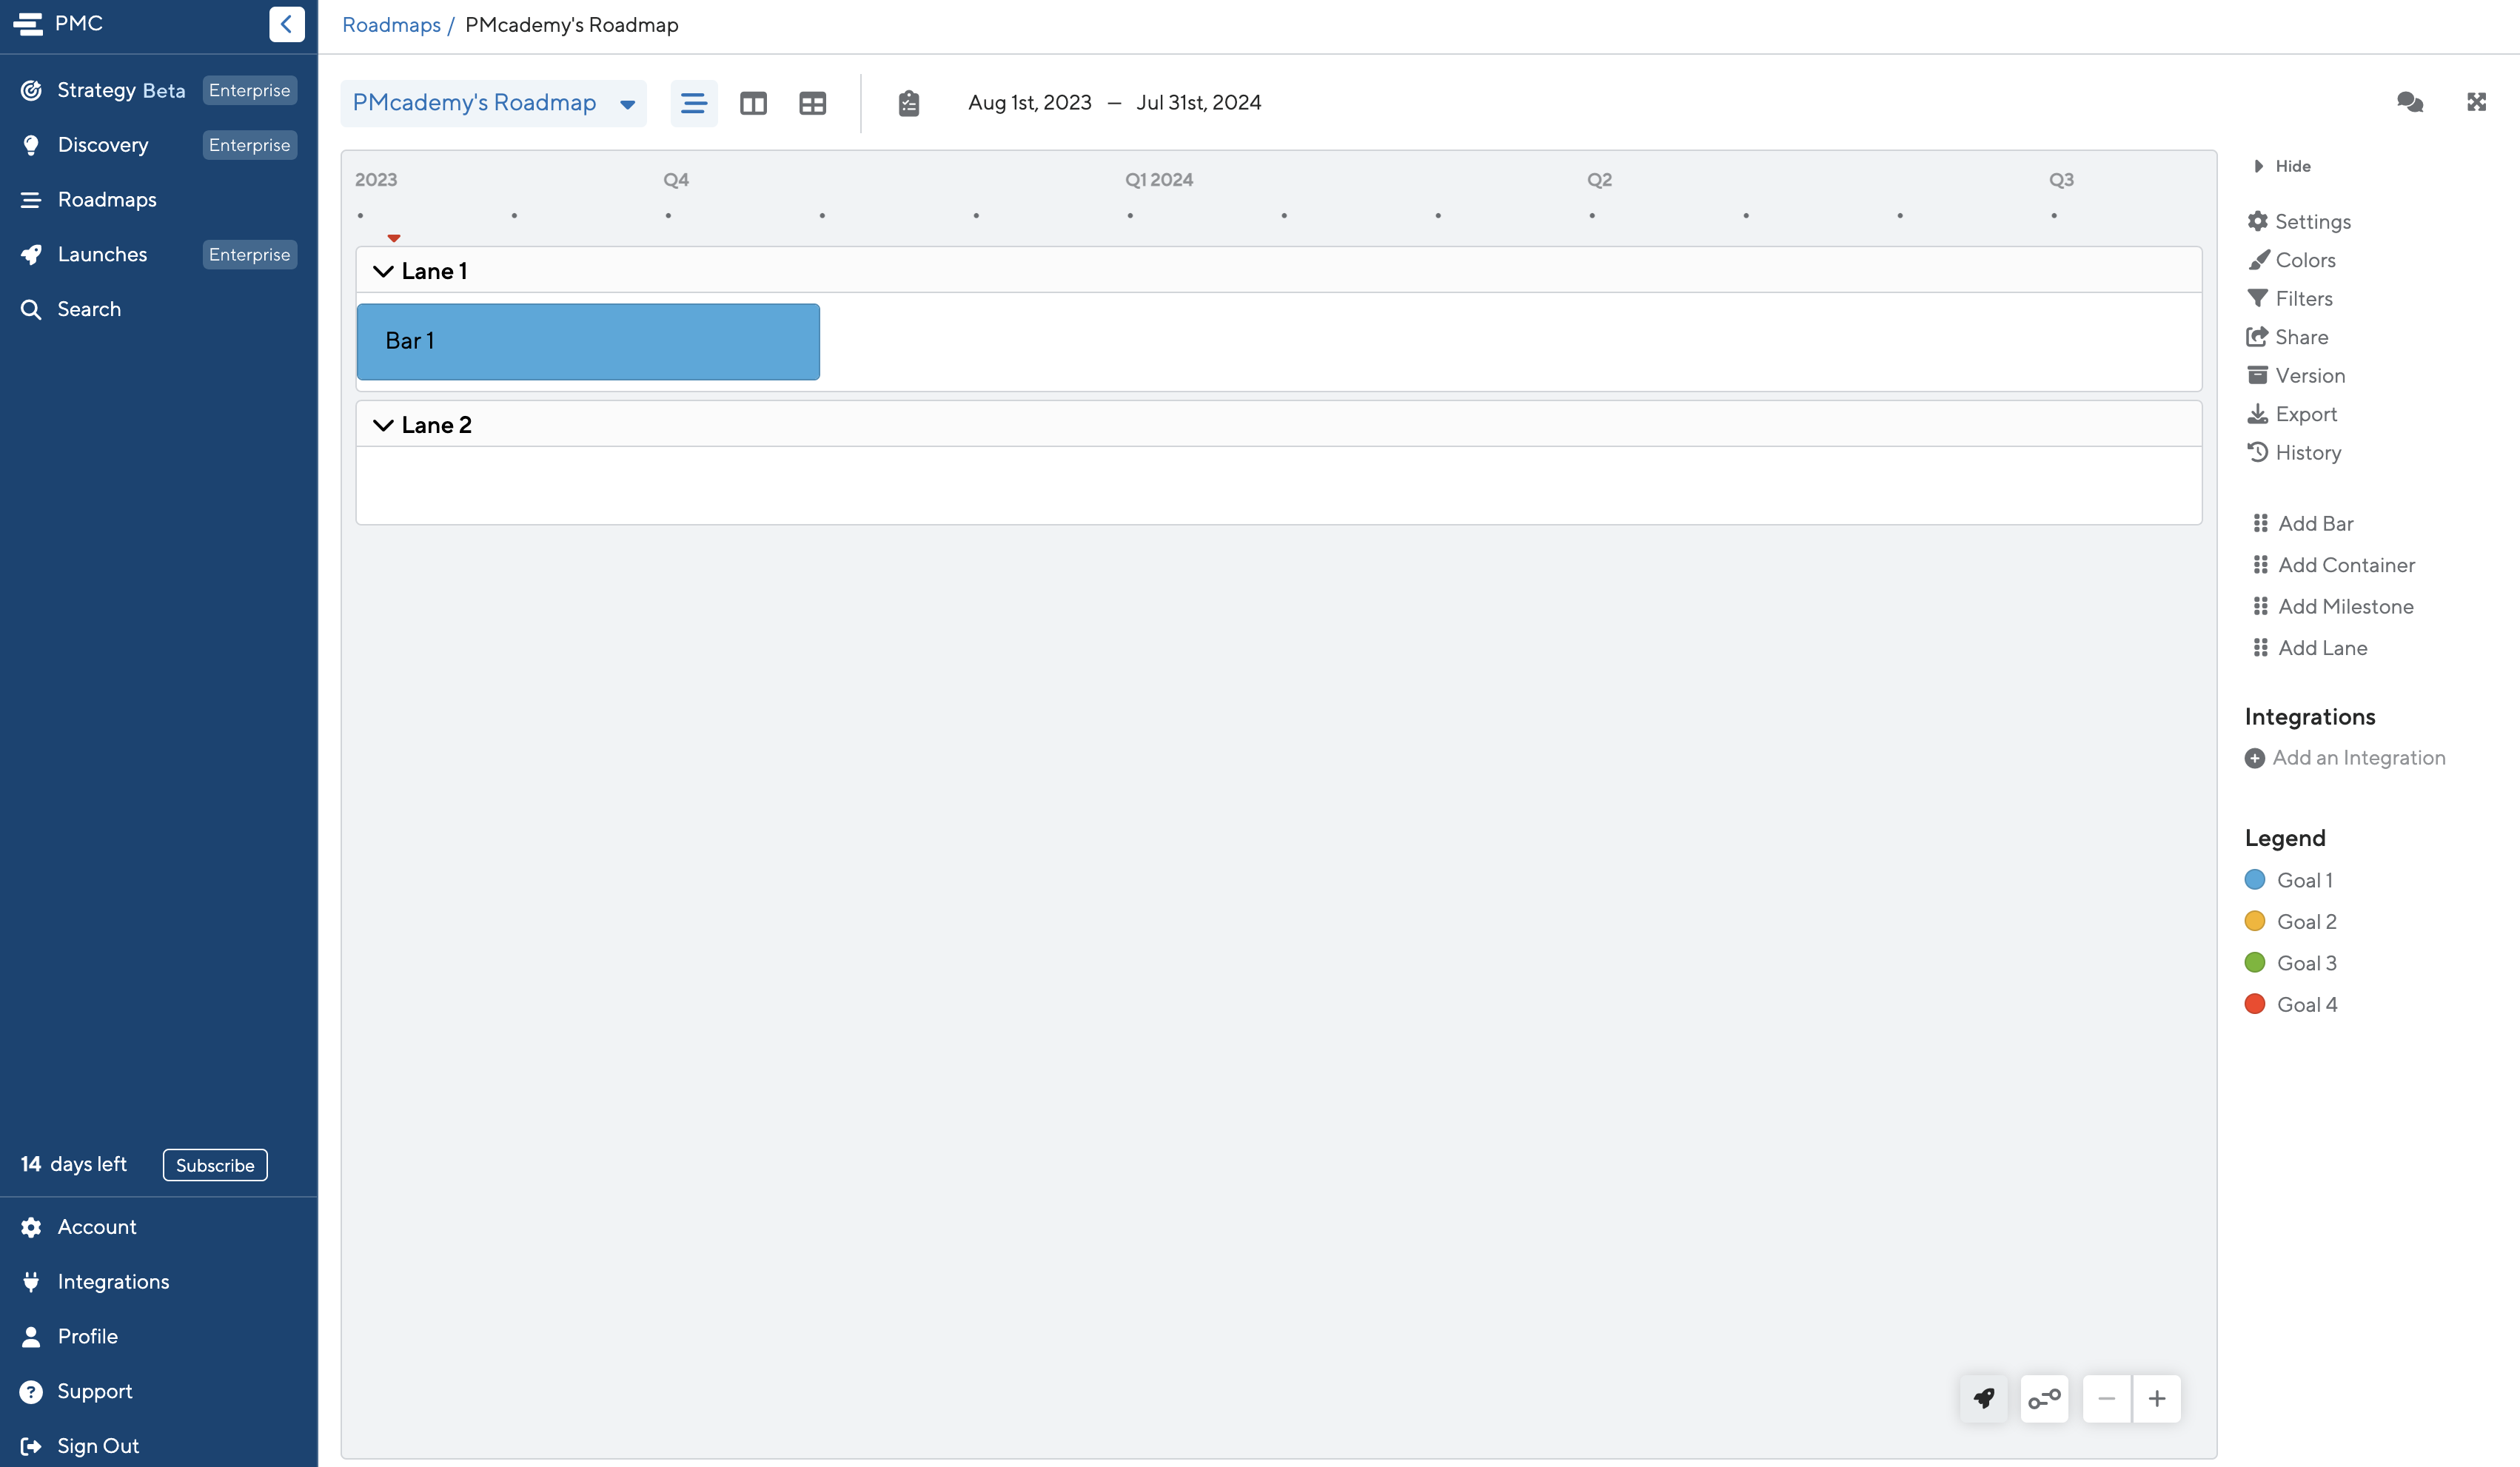
After you sign up, you'll see a screen like this. It's an empty roadmap. You can imagine the different lanes as either different projects or different teams.
Click the Settings button, located at the top of the right side menu. You can change the timescale of the calendar. Set it up as a three-month window by weeks:

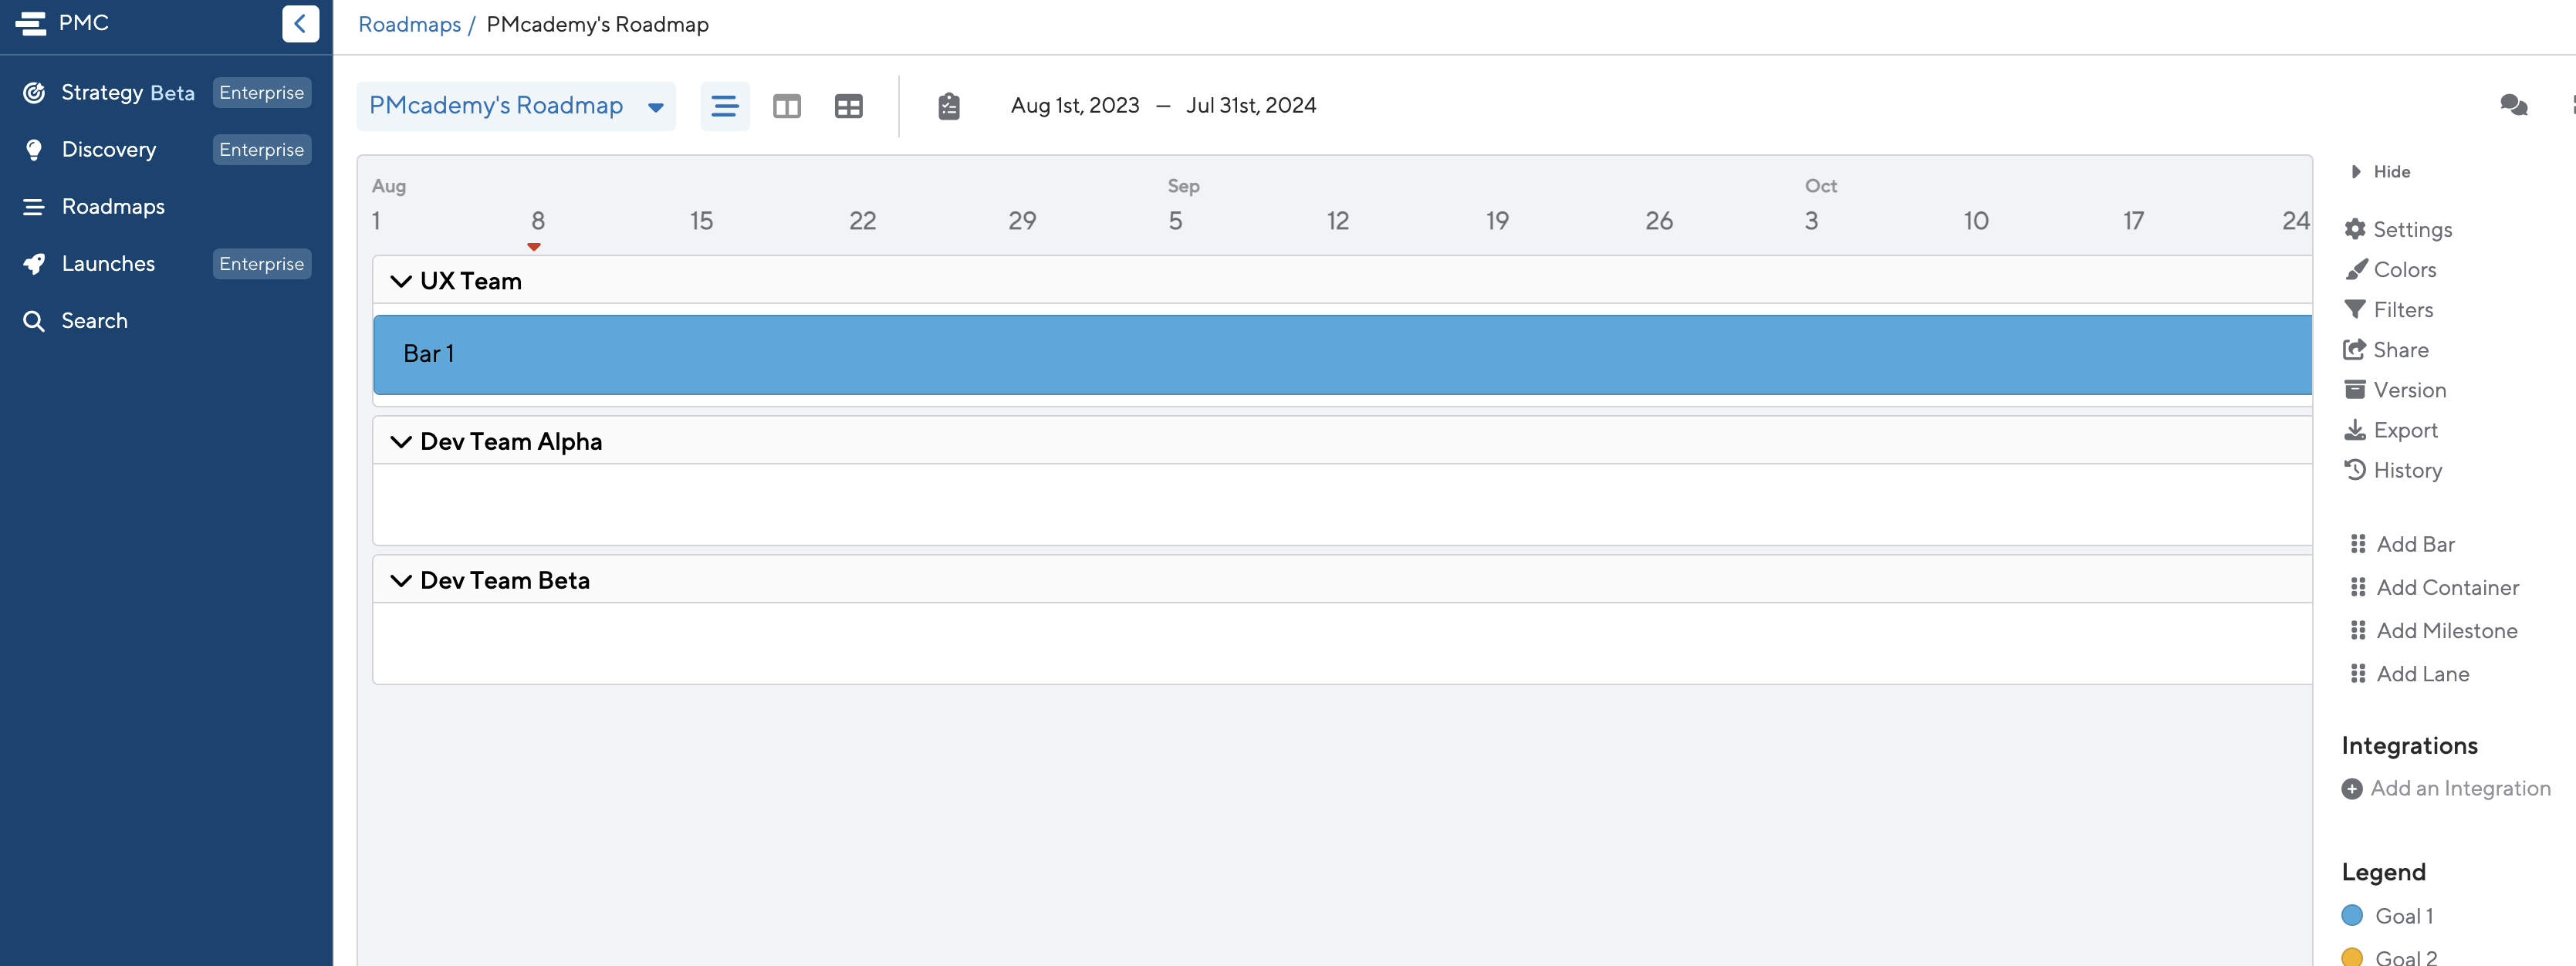
Imagine that you are setting up the roadmap for one design team and two development teams. Create a lane for each team. Edit the lane name by hovering over the name, clicking the menu icon that appears, and selecting Edit:
Now start adding in bars to represent the work each team needs to do. You can drag bars in as well as drag to resize the bars—you want the bar length to match the time required to complete the work. Rename the bars to show what the work is. You can rename a bar by single-clicking on it, then changing its title
If there are multiple, related steps in a single project, you can drag in a container to keep them grouped together. This is helpful if you need to show when there are tasks in one project that overlap, like creating and testing wireframes and mockup designs:
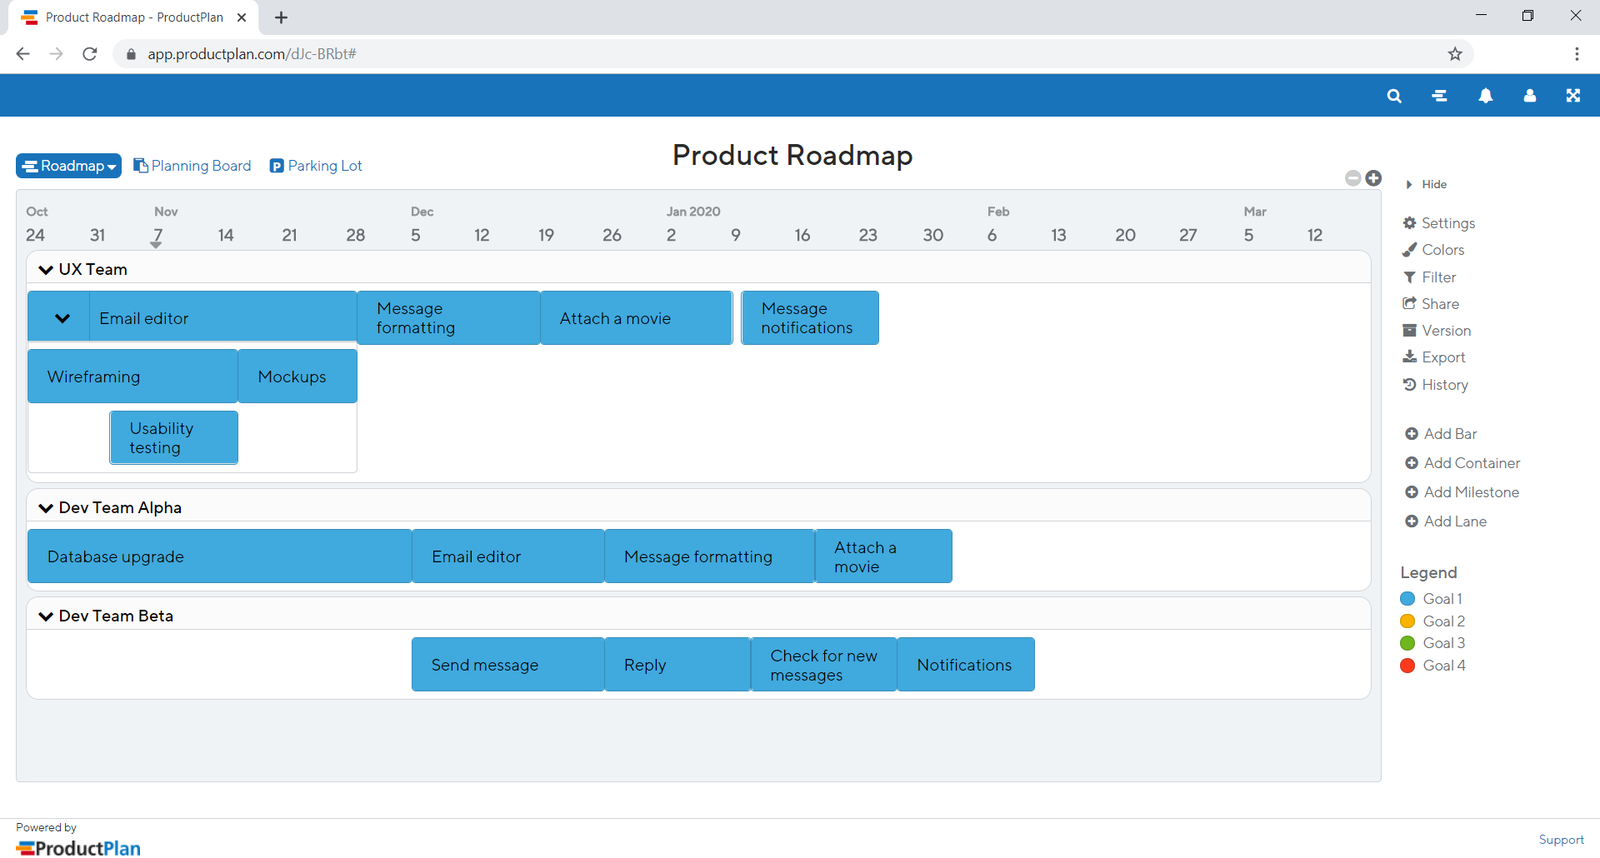
It's okay if not everything lines up or is exactly weeks in length; the estimates you plugged in here probably are not exact either. When you talk through this plan with other people, you need to explain that this is an estimate, not an exact measure.
With this done, you can see that the database upgrade is going to take a long time to get done, and no other development work can begin until it's complete. You can also see that the UX team has a lot of work to do, but they should be able to complete everything before the developers need to get started on it. Visualizing the work to be done is quite helpful.
When you go off schedule
Frequently, the actual progress of your projects will not go according to plan. When this happens, you need to do two things. First, you need to clearly communicate to your stakeholders what's changing and by how much. If it turns out that the database upgrade is going to take an extra week, and this is causing all subsequent work to be delayed, you need to share that with your stakeholders. They need to know so that they can take appropriate action, such as delaying launch announcements or adjusting revenue projections. Changes are to be expected; the mark of a good product manager is the ability to communicate those changes quickly and appropriately.
Second, you need to update your roadmap to show the consequences of a change. For example, maybe the database upgrade was going to be followed by a project with a strict deadline. Now that deadline is in jeopardy because of the extra week. With helpful roadmap software, you can quickly identify the impact of any delays and start moving other projects around to ensure that you can still hit your deadlines.
The video below provides more information on how to effectively handle changing timelines and unexpected delays.
Assignment 09 ⭐
It's time to practice creating a roadmap with ProductPlan (or another tool of your choice).
For this assignment, imagine you are working on a video call feature for LinkedIn. You have a spreadsheet with a list of prioritized, estimated features. It's now August 1st, 2023, and a few of these features have to be delivered to customers by specific deadlines (see spreadsheet).
You have two teams of developers. The dev time estimates in the spreadsheet are per team, and projects cannot be spread across two teams. You must complete the features prioritized as M (must in the MoSCoW method) before any other features. Besides that, all features can be worked on simultaneously; there are no prerequisites.
Plan the next three months of work, and decide how to get it done. If there are conflicts, what would you do to resolve them?
In addition, consider brainstorming ideas for how you could get more experience using various tools and project management methods in your current job or side projects—it could be a great addition to your candidacy for PM roles down the line.
Submission
Submit your links in the slack channel #assignment-09